I’m a believer in doing tasks by hand in the beginning. Having a close-up, tactile relationship with any task imparts knowledge. At times, when I am engaged in hand labor, I may not even know I have learned something. But I always realize it later; there is always some small but important fact I gleaned by handling my products.
So it is with seeds. Cleaning seeds by hand is time consuming and sometimes a little painful —neck, back, and fingers may complain. But the act of removing seeds from a dried flower is educational. Almost by osmosis, you learn about the flower structure, the shapes of seeds, and even when your flowers got pollinated or not.
In this article I am going to focus on cleaning zinnia seeds by hand for those operating at a very small scale. As you increase your seed saving, you may want to investigate strategies and equipment available to the seed grower. But when you’re saving seed from fewer than a couple hundred blooms, it’s just as easy to do it by hand.
Phase 1: Collecting seeds by hand
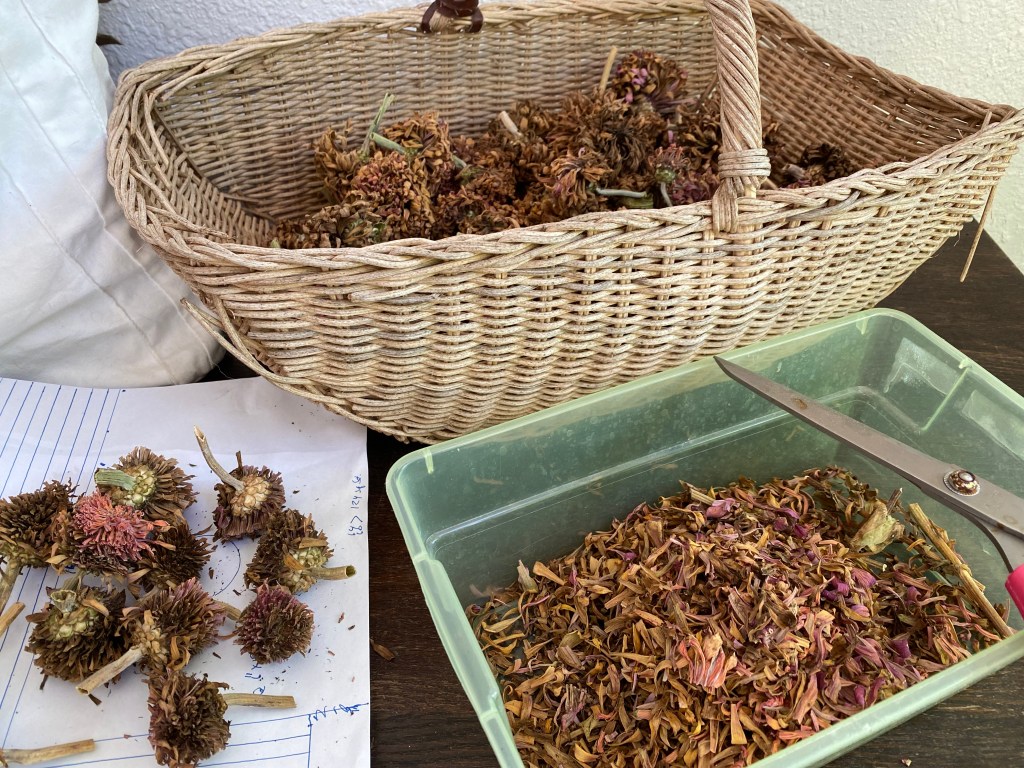
Pollinated flowers can be left to dry on the plant, then snipped off and brought inside to dry completely in an open paper bag, a basket, or other container with good air circulation. At the end of the season, when frost threatens, you can even cut off fresh flowers and bring them inside to dry. You can put a fan on them to expedite the drying process, but if you’re in no big hurry to process the seed, just leave them in a warm, dry place. When the petals are papery, you are ready to clean the seed.
Start by cutting the petals off the bloom, leaving only the center intact. Discard the petals into a separate container so you have less detritus to sort through.
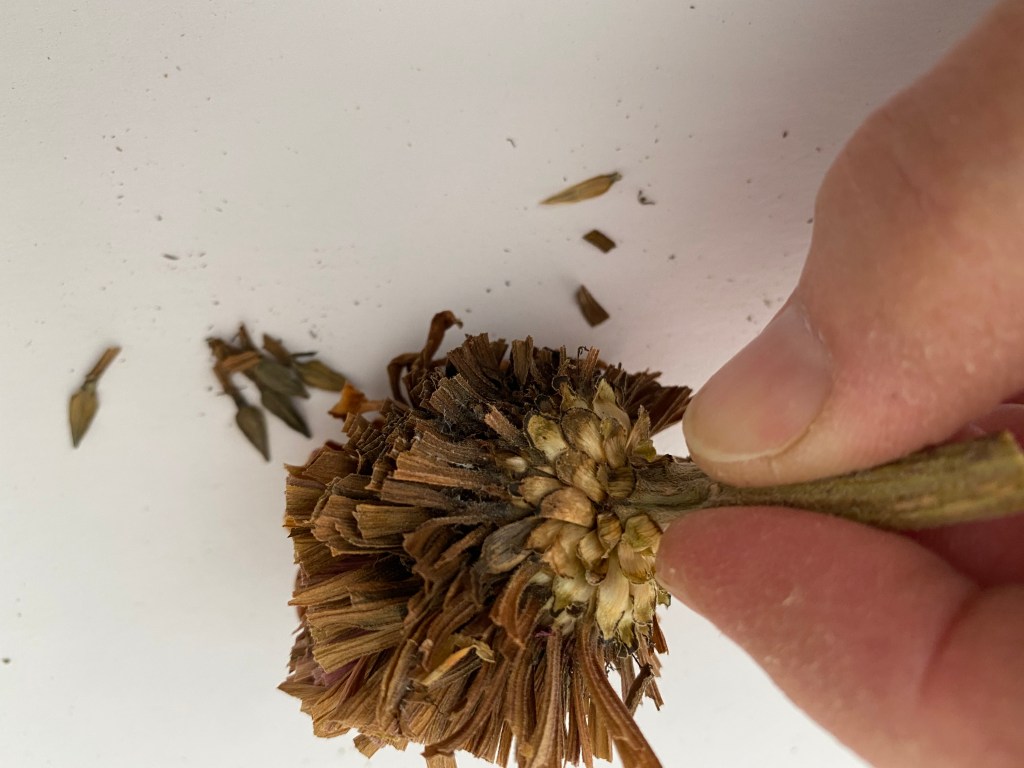
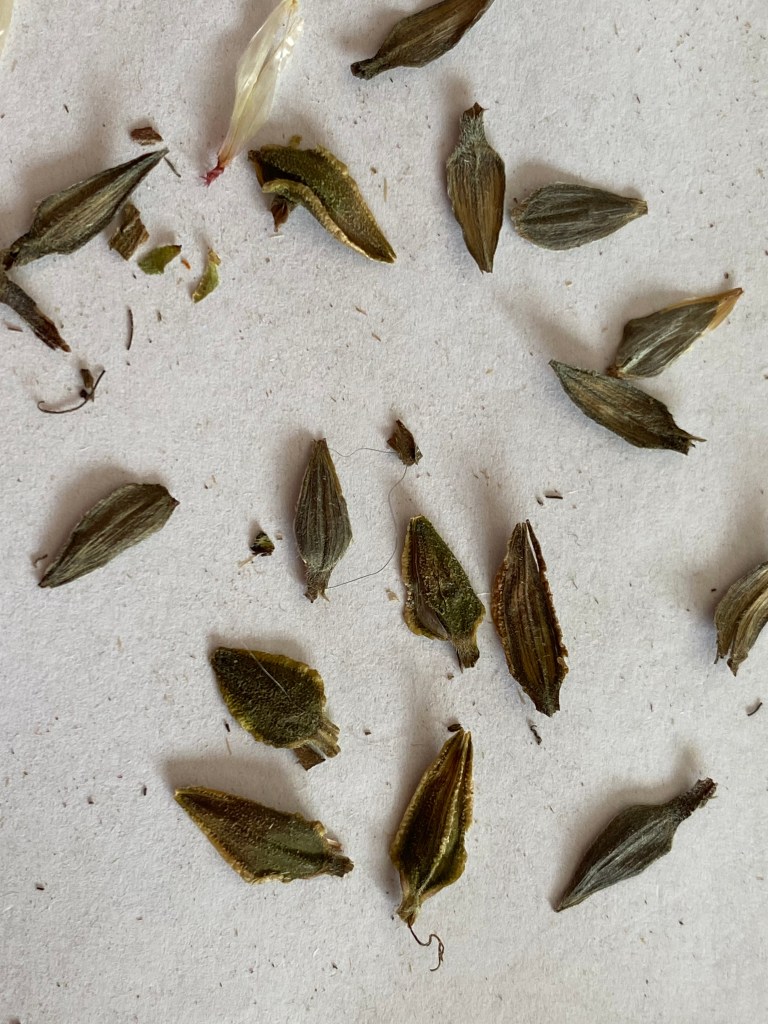
Crumble the remaining flower and sprinkle the seeds and chaff on a plate. Then pick through the material and pull aside any seeds that are dark and full. The first time I did this, I picked many seeds that turned out to be not viable. The next year, I inspected my seeds more closely in search of those that are plump and hard. To learn the difference between viable and not, try to bend a seed between your thumb and index finger. If it bends, it’s not viable.If it’s firm and hard, it’s good. In a short while, you will be able to see the difference between seeds that are viable and those that aren’t.
As you identify the viable seeds, move them onto a piece of clean paper, leaving behind all the chaff. Later you can pour them into an envelope and write the details on it: Crop year, date harvested, description, information about the cross, and number of seeds enclosed. Store your seed envelopes in a tightly closed container in a cool, dry location.
Phase 2: Automating some of the work
Once you have handled seeds for a while, and know viable from non-viable, you may want to seek shortcuts. For starters, you can crush the dried flower heads inside a cloth or mesh bag, using your hands, feet, a rolling pin — but with gentle pressure, only enough to separate the seeds from the bloom, not so much as to crush the seeds. This is known as threshing.
You may want to winnow the seed — blow off the chaff — with a fan. One method is to put the crushed bloom in a metal bowl and blow across it with a hair dryer on the cool setting to blow away the chaff. It takes practice to keep the seeds in the bowl, and the chaff blows everywhere, so do it outdoors. For larger amounts of seed, you can use a box fan elevated above a container; pour the threshed seed in front of the fan; the chaff will blow away as the heavier seed falls into the container.
At a larger scale, you can build your own seed cleaning machine or purchase a professional model. The machine will remove the chaff and non-viable seeds, leaving the heavier, viable seeds behind.
The resources below can help you get a feel for the possibilities when you get into serious seed saving. Until that point, pick a cold winter day, sit by a sunny window, and enjoy the process.
A truly useful overview of dry seed cleaning is available from the Organic Seed Alliance here.

Leave a comment